If you’re tired of the traditional massage routine and seeking a modern approach to soothe those sore muscles, let me introduce you to the wonder world of massage gun techniques! These percussive powerhouses are taking the wellness scene by storm, offering a rejuvenating and invigorating experience like no other.
So, get ready to unleash the secrets of percussion therapy and take your muscle recovery game to a whole new level!
See Big Selection of Massage Guns!
Table of Contents
What is a Massage Gun, and How Does it Work?
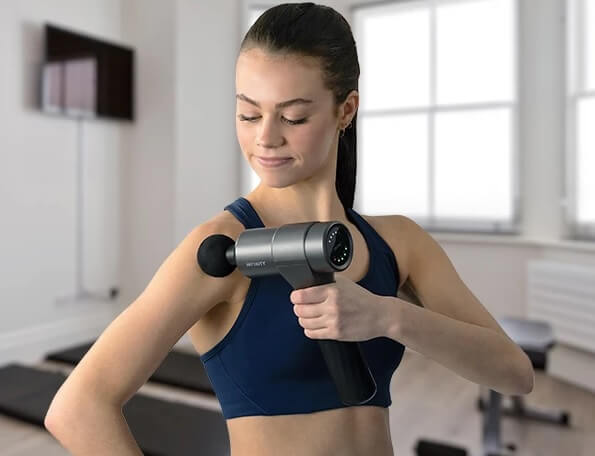
Before we delve into the techniques, let’s understand the basics. A massage gun, also known as a percussion massager, is a handheld device designed to deliver rapid bursts of pressure to the muscles, tendons, and soft tissues. The unique percussive motion mimics the movements of a deep tissue massage, but at a much faster rate.
The massage gun typically comes with multiple speed settings and interchangeable attachments to cater to different muscle groups and needs. By applying these gentle-yet-powerful percussions, massage guns aim to increase blood flow, release tension, and reduce muscle soreness.
The Art of Massage Gun Techniques
Now that we know the magic behind the massage gun, let’s explore some expert techniques to master this art of percussive therapy:
1. Glide and Sweep
Begin with the massage gun on the lowest speed setting. Gently glide the attachment over the targeted muscle group, applying light pressure. Slowly sweep the massage gun up and down, covering the entire area. This technique is perfect for warming up the muscles and relaxing surface tension.
2. Cross-Fiber Friction
For deeper penetration, increase the massage gun speed to a moderate level. Hold the gun perpendicular to the muscle fibers and move it in a cross-fiber direction. This technique helps to break up adhesions and scar tissue while enhancing flexibility.
3. Trigger Point Release
Focus on specific trigger points by placing the massage gun directly on the area of tension. Apply steady pressure for 15-20 seconds or until you feel the tension release. This technique is ideal for targeting knots and tight spots.
4. Circular Motions
Set the massage gun to a higher speed for a more intense experience. Use circular motions on larger muscle groups like the glutes, thighs, and back. This technique helps to increase blood flow and reduce muscle stiffness.
5. J-Stroke
Imagine drawing the letter “J” on the muscle with the massage gun. Start from the top of the muscle, move down, and then curve back up. Repeat this motion a few times, working your way down the entire length of the muscle.
6. Feathering
This technique is excellent for sensitive or recently injured areas. Use the massage gun on the lowest speed setting and lightly skim the surface of the skin without applying much pressure. The goal is to stimulate blood flow gently.
7. Quad Flushing
For athletes or individuals with tight quadriceps, use the massage gun with a quad flush technique. Glide the massage gun from the hip to the knee in a straight line, focusing on the quadriceps muscle. This technique aids in reducing lactic acid build-up.
8. Pat and Release
Gently pat the massage gun on the muscle, focusing on areas of tension. This technique can help stimulate proprioceptors and increase joint range of motion.
9. Calf Squeeze
Position the massage gun perpendicular to the calf muscle. Apply gentle pressure and “squeeze” the muscle using the massage gun. Gradually increase the pressure if desired, but avoid excessive force on sensitive areas.
10. Trap Press and Hold
Place the massage gun on the trapezius muscle (shoulder area) and apply steady pressure for 20-30 seconds. This technique helps to release tension in the upper back and neck.
Important Tips for Safe and Effective Use
While massage guns can work wonders, it’s essential to use them safely and effectively to avoid any unwanted discomfort or injuries. Here are some important tips to keep in mind:
1. Start Slowly
If you’re new to massage guns, begin with the lowest speed setting and gradually increase as you become more comfortable with the technique.
2. Avoid Bony Areas
Do not use the massage gun directly on bony areas or joints. Focus on the soft tissue and muscle groups.
3. Keep It Moving
Avoid leaving the massage gun in one spot for too long, as it may cause bruising or discomfort.
4. Listen to Your Body
If you experience pain or discomfort during the massage, stop immediately and consult a healthcare professional if needed.
5. Hydrate
Stay well-hydrated before and after using the massage gun to help flush out toxins from the muscles.
6. Use Proper Attachments
Different attachments are designed for specific purposes. Choose the appropriate attachment for each muscle group.
7. Not for Everyone
Massage guns may not be suitable for everyone, especially those with certain medical conditions. Consult your doctor before use if you have any concerns.
In Conclusion: Relish the Power of Percussion Therapy
As you embark on your journey to master the art of massage gun techniques, remember that practice makes perfect! With a little experimentation and the right techniques, you can unlock the full potential of percussion therapy and embrace the relief and relaxation it brings. So, pick up that massage gun, unleash your inner masseuse, and let the percussions work their magic on your muscles. Happy massaging!