There are many factors that contribute to both the quality and the price of a thermal imager. Here I’m going to talk about several models of handheld thermal heat vision cameras. The more expensive they are, the better features they have.
Table of Contents
Best Heat Vision Cameras For Sale
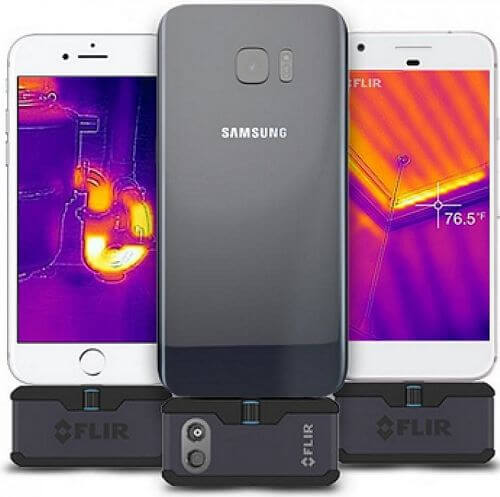
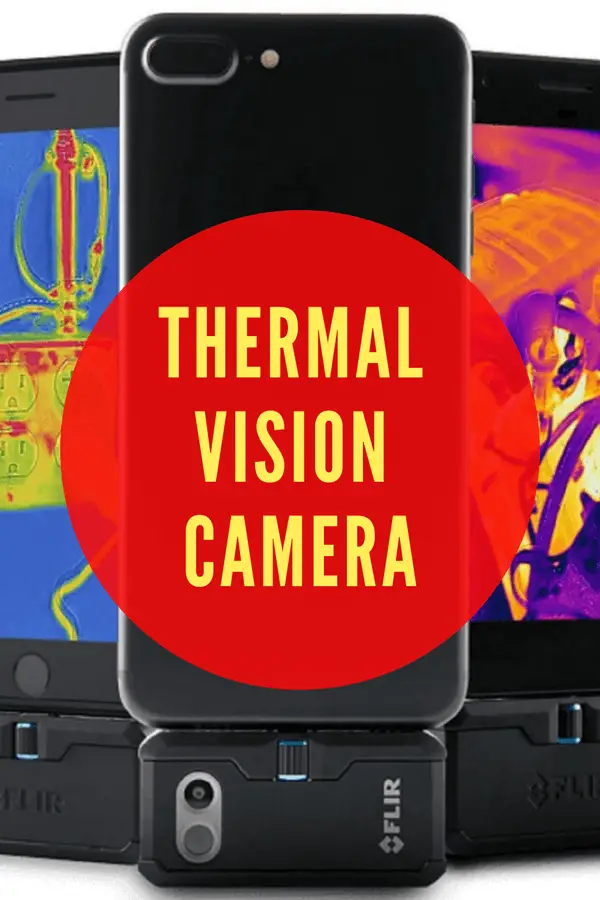
FLIR One Pro

FLIR camera has been around as an attachment like this for a while. It was called FLIR One in the old days and it has being upgraded to this high resolution version with the FLIR One Pro.
This is one of my favorite tools, it’s small and very easy to transport. I just put it in my tool belt or in my pocket and it works with your smartphone.

Whether you have an iOS or an Android, it works with either one. You just have to get the right one. Then you just download the app, which is very simple to do, you go online and download the FLIR One app and you’re ready to go.
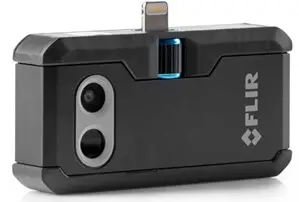
When you plug the device (which should be turned on by pressing the power button at the bottom) into a phone, the app will start immediately if you have it installed.
This has the one fit connector which I really love. What they did on this FLIR One Pro is they have a little dial on it. Now you can use that dial to actually raise and lower that connector, which is really smart because a lot of times on your smartphone you might have a case on it which is thicker, so that dial allows you to actually work with the case without having to take the case off.
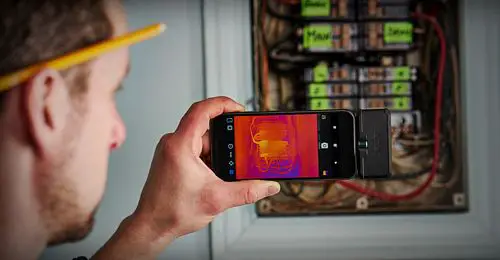
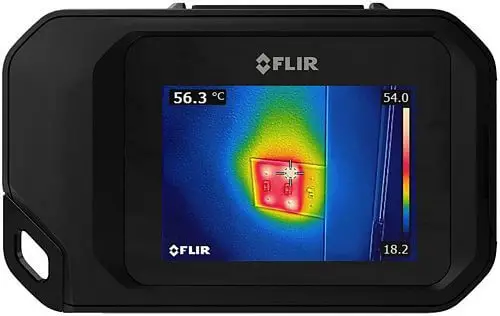
You can use this heat vision camera to check something, for example, if you are looking for water infiltration or air infiltration or if you are looking for heating or cooling problems. You can’t see those things with the naked eye but you can see them with thermal imaging. That’s why this is so important.
FLIR One Pro heat sensitive camera measures temperature differences between -4F and 752F.
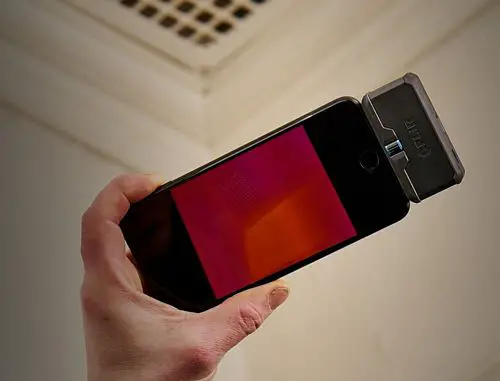
The camera uses what they call the MSX technology, which is where they overlay the visual image with the thermal image which gives you a really crisp picture of what you’re looking at.
The way that works is there are actually two cameras. There is a regular camera and then down there is the lepton thermal imaging sensor.
This has its own battery (you can charge it with a USB type-c cable) and then it allows you to composite the image to show detail that you wouldn’t previously be able to see.
Once you buy FLIR One Pro you will be able to see both thermal energy and visible information in the blended MSX image. So you can see the words on the screen. It would be useful if you are looking at a fuse box and you could read the labels.
It’s got video and photo capability and you can document everything that you’re doing and have it on your phone. If you take a photo, you can swipe and compare the image versus the actual thermal signature.
See: Perfect Trail Cam With WiFi, Night Vision, App
You can can make some tweaks. If you click edit button, it lets you put a spot anywhere on the image to measure the temperature. You can do rectangles and circles and kind of look at certain areas in your image and see what’s happening there. You can either show the visible photo or you can chose to show only the thermal image or a mixture of the two. It also shows you the scale – how much max-min temp was recorded in that photo.
There are different palettes so you can look at it in different ways. It’s very cool that you can do this on pictures, after the fact, which I think is pretty damn awesome.
The cool thing about this is it gives you all the detail that a standard thermal camera wouldn’t do. For example, with a standard heat sensitive camera you wouldn’t be able to see the text because it would all just be hot or cold. So this heat vision camera is actually far more detailed!
You also have the option of recording video, which is very cool. There is the option of doing a time lapse, which means you can kind of see, for example, how is the Sun affecting your plants outside during the day.
So whether you’re a homeowner and you want to make sure that your house is buttoned up, or you have a contractor that comes in and does work and you want to check that work, this thermal imager is a great way to do that.
If you’re doing some plumbing or you’re about to bust a hole in some drywall or something, you want to know what’s on the other side. You want to know what you can and can’t touch, what’s too hot and what isn’t or if you’re having overheating problems at home or even in your car, this heat seeking camera could be really, really useful.
Start playing with it, just take this and run it through your house. I can’t tell you all the places where you’re going to find it useful. There’s actually a thermal reader on this and it will tell you exactly how hot something is.
You can find leaks in your wall. One day I was able to find pests. I went outside into the garden and I pulled this out and I saw all these little moving heat blobs. They can’t hide from me!
This thermal heat vision camera is not just a toy, this is a valuable tool!
![]()
![]()
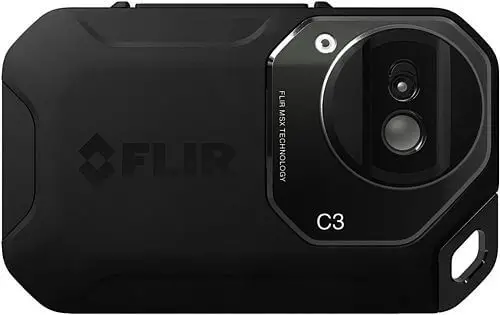
FLIR C3 Heat Vision Camera

This is a great, yet cheap thermal vision camera.
It’s awesome for doing structural inspections because it has enough resolution to provide the information you will need.
What’s great about this heat detector camera is that it’s very pocket friendly and very easy to use. It is capable of capturing thermal measurements from 14°F to 302°F.
There is a nice galvanized rubber coating on this system, keeping it safe from any accidental drops. So it’s a real industrial professional tool that holds up in the field.
The screen has a flexible plastic feel to it, so unlike the glass used by phones, this can withstand lots of beating before shattering. It’s not water/dust proof, so like your smartphone, be careful.
It has very few buttons to use. It has an on/off button and a photo capture button that is also a menu selection button once you get into the camera. This action button is over sized, which is really helpful.
On the front, there are visual camera as an identifier and a thermal camera that is an 80 by 60 IR sensor to give you a lot of data. There is also a lamp for enhancing your visual light images. On the other end, there is internal memory and image transfer data cable connection.
It boots up quickly, 10-15 seconds. The screen, which is very responsive, is bright by default, but you can choose between 3 settings – low, medium and high.
Everything else is going to be done via touch screen. It has a main menu and sub-menu. With this menu system you can go in and check some of the viewing options of the camera.
Tap the screen to bring up your menu options. Upper part, going from left to right on the camera, you have a spot temperature reading and it is reading the fixed center spot, there is a battery warning and then Wi-Fi connection so you can remotely send images over to your phone or tablet.
Lower part of the menu, from left to right, there is playback button for looking back at your images, image modes, spot measurement options, color palettes, option for a lamp on and off and then your settings menu.
Just looking at the screen, you have your temperature scale on the far right and that is always in auto temperature range unless you lock it. To lock it, all you are going to do is tap it. That means that anything that you look at over and above that temperature is going to show up either black for dark or white for hot. So looking at something dark, it’s just telling you that it’s below your low end temperature scale.
Another great feature on this camera is a patented thermal MSX technology, where you take that visual image and you overlay it on top of 100% of the thermal image.
Another great advancement with the FLIR C3 heat sensitive camera is the spot measurement tool. So there are the center spot, no spot, cold spot and hot spot. What’s great about this hot spot feature is the cursor will go to the hottest spot in the viewer and that gives you an immediate measurement in the upper left-hand corner.
Another great feature on this thermal heat vision camera is the availability of Wi-Fi. You are able to capture data with the camera, go into their archive and Wi-Fi that information to their free FLIR tools software so that it can get out to the world immediately.
It doesn’t use a SIM card, but you can plug the cam in the computer with a USB cord. You can recharge it through the USB port.
Inside the box you get:
- C3 thermal vision camera
- Power supply/charger
- USB cable
- Lanyard
- Multiple international power supply plugs
- Tripod mount
- Manual
You can use this heat detector camera for multiple tasks – for troubleshooting HVAC issues, for maintenance on different machines, for looking for lack of insulation, moist areas, etc.
One of the uses could be power saving. The thing is that many devices are running hot even when not on. These include the fan, lamps, gaming systems, etc. This means that they are adding to your energy bill. So, use this camera to find such devices in your home and unplug them.
Another good use for this model could be when making a large purchase, such as a TV or laptop, to make sure there is nothing wrong with it – no hot spots.
There is a small number of negative reviews on the internet about C3 and that’s because some people have the expectation that this handheld thermal imager will operate like an infrared camera that costs thousands of dollars.
Believe me, for the price, C3 is outstanding thermal imaging camera for sale. Don’t buy a Hyundai and expect a Ferrari.
I’m really impressed – what an incredible and useful piece of technology for many different uses!
![]()
![]()
If you need a thermal vision camera for doing in depth inspection, you need a more expensive camera. That’s where more advanced FLIR cameras come into play.
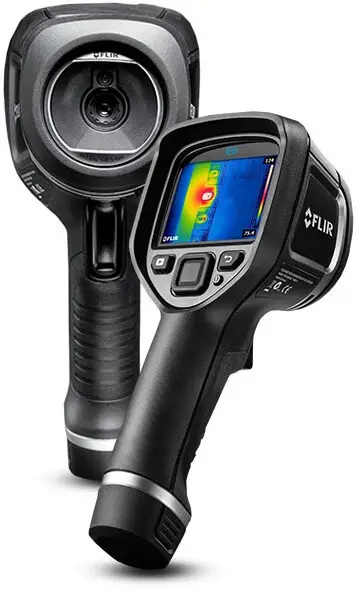
FLIR E4
It is the first thermal imaging camera costing under $1,000 to offer high quality thermal images, a built in visible camera and patented MSX image enhancement.
It has a very good 80 by 60 pixel thermal detector with a fixed focus 45-degree lens. This gives you nice wide field of view.
The E4 thermal vision camera has temperature range from –4° F to 482°F.
Once the camera is tuned on, all you need to do is flip open the cover and do on-the-spot thermal inspections.
It has a bright 3-inch LCD that’s easy to see and by using your thumb you can go to the simple interface where you can access parameter settings like emissivity and reflect the temperature, the color palette and thumbnails of stored images you review anytime on the screen or download later with the USB cable.
The E4 thermal vision camera automatically determines the temperature range in the scene. However, in case you find an image contrast that gives you great details, you can lock it in for better results. The interface also leads you to imaging modes like MSX.
An amazing thing about MSX is that it adds key detail from the visible camera to the thermal image without diluting the thermal image. This great technology enhances the scene so you can find where the heat issue is immediately.
This is a good camera if you a beginner in using heat sensitive cameras or for quick scans and safety checks.
![]()
![]()
But if you need higher thermal resolution, more on screen temperature measurement tools and extra features, check out the E5, E6 and E8 cameras below.
FLIR E5
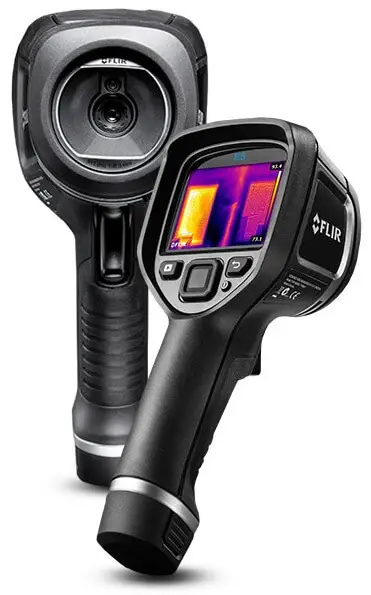
With 120 by 90 pixel thermal resolution, the E5 gives you more than twice the image clarity in pixels on target as the E4.
It also has a more sensitive detector to help show you more detailed thermal patterns. Along with a center spot meter you can hover over your target to measure temperature, E5 also features an area box choice that has an auto hot or cold spot to lock on to the maximum or minimum reading within the box. Or you can turn off the tool altogether.
The e5 has a bright 3-inch LCD and quick access to the easy on-screen interface. A simple press of a couple of buttons and you’re setting parameters, choosing color palettes, thumbing through your stored images and more.
Choose thermal only mode, the visible camera if you want or MSX to enhance the thermal image with recognizable details captured with the built-in visible camera.
You can select your visible camera, your thermal camera or MSX which actually itches invisible details from the built-in visual camera on the thermal image.
More vivid image clarity and still extremely affordable, but if you want almost double the resolution of the E5 and a camera that meets resonate thermal imaging standards, plus some very useful additional features be sure to look at the E6.
![]()
![]()
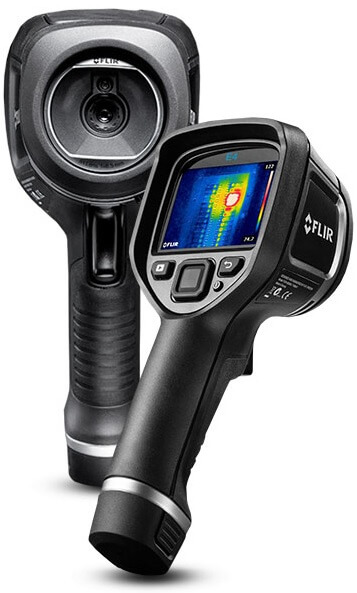
FLIR E6

This is really a powerful thermal imager considering how affordable it is. It’s got 160 by 120 pixel thermal resolution, twice the number of pixels as its little brother the E5.
Now not only do more pixels produce greater image detail, they help you detect and measure heat issues much better on smaller components and targets farther away.
Plus if you’re a home energy rater or contractor, the E6 meets the RESNET standard.
The e6 also features a more sensitive detector to help show you subtler thermal patterns. It’s got a bright 3-inch LCD that makes it easy to see the heat and an interface that’s even easier to use.
Quickly thump through settings and parameters, pick the best color palette, review stored images and add temperature measurement tools such as area box with an auto cold or hot spot to help quickly hunt down minimum and maximum temperatures.
Or you can use the center spot measurement to accurately measure directly in the center of your screen.
Plus the E6 gives you an isotherm mode that instantly alerts you to temperatures above or below a set threshold.
Choose thermal only mode, the visible image, picture-in-picture or MSX that enhances the thermal image with the visible details you need.
Like all E series models, the R6 comes with FLIR tools reporting software that you can use on your PC or MAC.
![]()
![]()
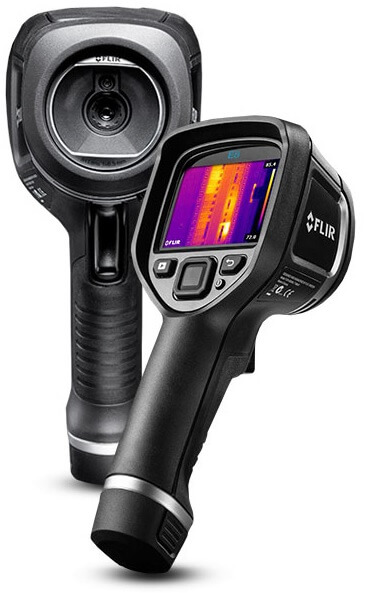
FLIR E8

It is the highest resolution E-x series camera. Like the E4, E5 and E6, the E8 is a very easy to use point-and-shoot thermal imager. It’s got a fixed focus, lens that gives you a nice wide 45 degree field of view and a bright 3-inch LCD that makes images pop.
The simple user interface is only a button push away and gives you quick access to parameters like emissivity so you can measure surfaces accurately, a choice of color palettes and different viewing modes. You can choose thermal only, visible only, picture in picture or MSX that enhances thermal images with key visual details so you can instantly recognize the location of the problem you found.
But as I mentioned a moment ago it’s resolution that really sets the E8 apart in the E x-series line. At 320 by 240 resolution, the E8 gives you 76800 pixels of thermal imaging power. That not only produces a stunning image but it puts more spots on the target to help you measure temperatures more accurately, especially if they happen to be small ones or you need to scan components from a safe distance.
E8 also gives you some handy diagnostic tools including an area box with an auto hot or cold spot to track the highest and coolest temperatures within it, an isotherm options and more.
The E8 can store a ton of images you can thumb through. Bring up full screen and download later to your PC or Mac with the supplied FLIR tools software.
FLIR tools allows you to later analyze images further and build great-looking reports to share with your customers or clients.
![]()
![]()
FLIR E60

Now if you like the superior image of the E8 you’ll also want to consider the E60. It has the same pixel resolution but with a whole different level of extremely useful communication and productivity features.
This heat vision camera includes wireless connectivity to mobile devices and test and measurement meters, interchangeable lenses, an on-board LED lamp and laser pointer. Definitely worth looking at. Find more here.
See also: